After upgradation of database , DB Tier would not have the auto config features , we need to make sure that we enable the auto config. The below steps helps us to do so
1. Copy AutoConfig to the RDBMS ORACLE_HOME
Update the RDBMS ORACLE_HOME file system with the AutoConfig files by performing the following steps:
On Application Tier
i) On the Application Tier (as the APPLMGR user), source the environment file from APPL_TOP.
ii) Create appsutil.zip file –
—perl $AD_TOP/bin/admkappsutil.pl
This will create appsutil.zip in $APPL_TOP/admin/out
On Database Tier
iii) On the Database Tier (as the ORACLE user), Copy or FTP the appsutil.zip file to the <RDBMS ORACLE_HOME>·
iv) cd <RDBMS ORACLE_HOME>
v) unzip -o appsutil.zip
.
2. Copy Source Database Tier Context file to Target ORACLE_HOME
.
i) Login as Source Database Tier Owner
ii) cd $ORACLE_HOME/appsutil
iii) Copy $CONTEXT_NAME.xml ($CONTEXT_FILE) file to Target <RDBMS HOME>/appsutil
3. The AutoConfig check utility
The AutoConfig check utility is located at Target Database Tier <RDBMS ORACLE_HOME>/appsutil/bin
.
i) Check the AutoConfig configuration files by executing the following command
adchkcfg.sh contextfile=<CONTEXT>.xml appspass=<APPSpwd> — This report provides information about All the profile options that get changed during the next normal execution of AutoConfig.
— For every profile option there is information about the current value in the database, the changed value and the AutoConfig script that changes the profile option.
— The script will also create a zip file report “ADXcfgcheck.zip” that contains all the files and reports mentioned above, so that you can copy the ADXcfgcheck.zip to a local desktop PC and view the html report from there without breaking the hyper-links in the report.
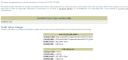
The snapshot of the profile report
 .
.
The snapshot of Configuration Check File

3. Copy Script directory from source home to Target Home
i) Login to Source Oracle database Tier owner
ii) Go to <RDBMS HOME>/appsutil
iii) Copy Script directory to Target <RDBMS HOME>
iv) Check autoconfig script and change the PATH
v) Check the environment file whether TNS_ADMIN is pointing to the correct directory
The below step we can do it while upgradation from 9.2.0.6 to 10.2.0.1
.
4. Create nls/data/9idata directory
On the database server node, as the owner of the Oracle RDBMS file system and database instance.
run the $ORACLE_HOME/nls/data/old/cr9idata.pl script to create the $ORACLE_HOME/nls/data/9idata directory
.
5. Context file Generation
Log in as Target database
Go to <RDBMS Home>/appsutil/bin
perl adbldxml.pl tier=db appsuser=<APPSuser> appspasswd=<APPSpwd>

