Steps to Integrate Discoverer 11g with OAM 11g
Of late, I was working on configuring Oracle BI Discoverer 11g Release 1 (11.1.1) single sign-on using Oracle Access Manager 11g. I Followed the procedure below to use Oracle Access Manager with Oracle BI Discoverer:
Assumptions :
- Oracle BI Discoverer is Installed and configured.
- Oracle Access Manager is Installed and configured.
- EBS Instance is configured with WNA (Zero Sign on) using OAM/OID 11g (Read Atul’s Book “EBS integration with OAM 11g R2”).
Steps to configure Discoverer 11g with OAM:
- Register the OSSO agent (mod_osso) with OAM 11g.
- Open oamconsole and under System Configurations->Access Manager ->SSO agents->OSSO Agent, create one osso agent.
Following registration with OAM 11g, the mod_osso module:
- Checks for an existing valid Oracle HTTP Server cookie
- Redirects to the OAM Server if needed to contact the directory during authentication
- Decrypts the encrypted user identity populated by the OSSO server
- Sets the headers with user attributes
Base URL http://cph-core-db01-s:8888 . It will create Application domain, resource URLs, host identifier, Authentication Policies and authorization policies.
Apply the changes
After it is created, it looks like below.
3. On Discoverer OHS server
Edit the mod_osso.conf file as follows:
- Copy the mod_osso.conf file from the
$MW_HOME/instance_name/config/OHS/ohs1/backup/disabled directory to the
$MW_HOME/instance_name/config/OHS/ohs1/moduleconf directory. - Create a folder named ‘osso’ under the location $MW_HOME/instance_name/config/OHS/ohs1/ and copy the osso.conf file generated after registration (Step 2) at $DOMAIN_HOME/output/osss_agent_name/ (OAM Server)
- Edit the mod_osso.conf file from the location $MW_HOME/instance_name/config/OHS/ohs1/moduleconf and add the following lines:
- LoadModule osso_module “${ORACLE_HOME}/ohs/modules/mod_osso.so”
<IfModule osso_module>
OssoIpCheck off
OssoIdleTimeout off
OssoHttpOnly off
OssoSecureCookies off
OssoConfigFile MW_Home1/asinst_1/config/OHS/ohs1/osso/osso.conf
<Location /discoverer/plus>
require valid-user
AuthType Osso
</Location>
<Location /discoverer/viewer>
require valid-user
AuthType Osso
</Location>
<Location /discoverer/app>
require valid-user
AuthType Osso
</Location>
</IfModule>
- Save the mod_osso.conf file.
- Restart Oracle HTTP Server by running the following opmnctl commands located at ORACLE_INSTANCE\bin directory:
- opmnctl stopall
- opmnctl startall
Post Steps :
- Ensure that the value of OssoConfigFile is set correctly in mod_osso.conf file. Ensure that the values of OssoIPCheck and OssoHTTPOnly parameters in the mod_osso.conf file are set to off.
- Start Fusion Middleware Control, and navigate to the Discoverer Administration page. Select the ‘Allow authenticated Oracle Single Sign-On (SSO) users to create and use private connections to SSO-enabled Oracle Applications databases, without entering a password’ check box. Verify attribute enableAppsSSOConnection=”true”in $DOMAIN_HOME/config/fmwconfig/servers/WLS_DISCO/applications/<discoverer_version>/configuration/configuration.xml
- Restart the Oracle Access Manager server that is hosting the OSSO Agent.
- Verify whether the Oracle BI Discoverer URLs can be accessed through the OAM authentication screen.
To enable WNA for application domain disco_agent
Policy Configuration ->Application domains->disco_agent->authentication Policy->protected Resource Policy
Change the Authentication Scheme to “KerbrosScheme” (one which is already being used by WNA enabled EBS Application domain)
Save the changes.
Add the TNS details for EBS to be accessed using Discoverer, on Discoverer side.
That EBS Instance must be SSO enabled and configured with Same OAM Instance.
Now,Open the URL : http://cph-core-db01-s:8888/discoverer/plus
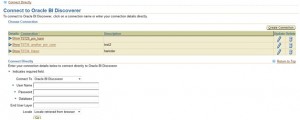
Since its WNA enabled, you will directly see below page for my user (there are three connections defined).
To use SSO, we have to create private connections respectively for each user (Three defined for my user).
How to add a New Connection :
1. Access http://cph-core-db01-s:8888/discoverer/plus
2. Click on create Connection Button.
3. Fill the details like its given in below snapshot
4. click continue and it will populate your username in user name field automatically
5. Click Ccontinue, then select the responsibility from dropdown and click continue again.
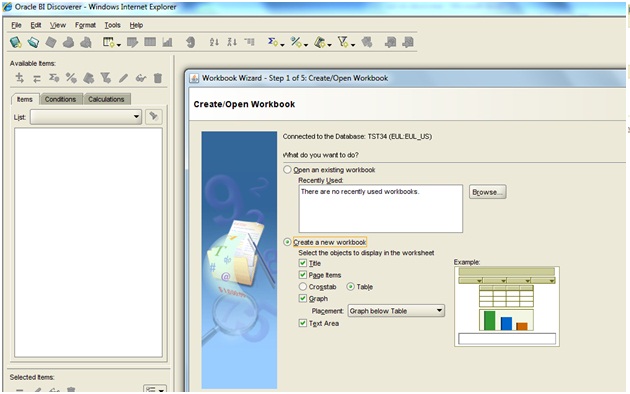
6. Select end user type from dropdown, click continue (your connection is now created ) and will connect for first time to Disco plus applet.
Now this private connection will be visible on Discover Plus home page for your user.
Points to note :
1. http://cph-core-db01-s:8888/discoverer/plus will be the single URL for users (we don’t need users to use connection key)
2. Since each user can have his/her own private connections, like for my user HARSN-IN (you will have different private connections for your respective user)
Private connections of one user, won’t be visible to another user and vice –versa.
So given that each user has made his/her private connection, when he /she will access this http://cph-core-db01-s:8888/discoverer/plus URL . the user will see the connections defined for his/her user.
3. When they will click on the connection they want to access , Discoverer Plus Applet will open without asking for any credentials directly (SSO working).
4. Users will have to define connections themselves which they frequently use on Home page of discoverer Plus.
5. AFAIK , SSO works for defined private connections only not for the below part of home page (Connect directly) :
Refer The below Notes from Metalink :
Using Discoverer 11.1.1 with Oracle E-Business Suite Release 12 (Doc ID 1074326.1)
How To Integrate Discoverer 11g With Oracle Access Manager ( OAM / SSO ) 11g (Doc ID 1448235.1)


