This is in continuation of my last post on Database Connectivity (JDBC) in WebLogic Server here , In today’s post I am going to cover step by step JDBC configuration using Administration Console.
1. Login to WebLogic Server Administration console (default port 7001)
http://hostname:port/console
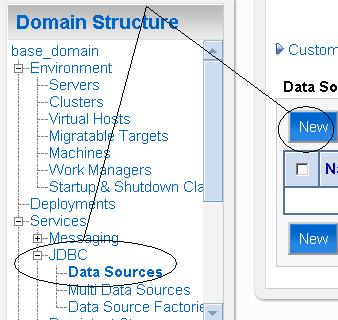
2. Select Data Sources under JDBC in Services section
.
.
3. Click on New button on right side as shown above
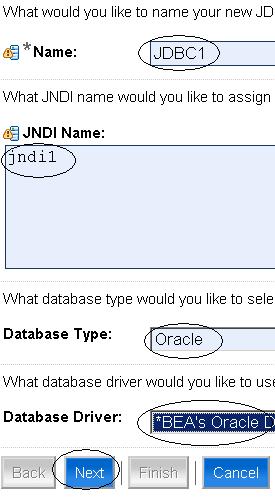
4. Enter JDBC Name, JNDI Name, Database & Driver type as shown below
.
.
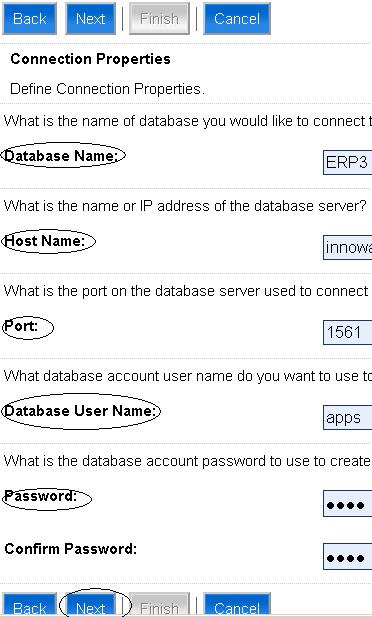
5. In next screen, enter database connection pool details i.e.
— Database Name
— Host Name (on which database is running)
— PortNumber (on which database listener is listening)
— Database User Name
&
— Password (for database user)
.
6. In next screen you test connection by clicking on “Test Configuration” as shown below
.

.
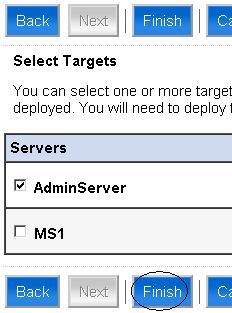
7.Finally you select target servers (Administration and Managed Server in that domain) for that Datasource.
.
8. On clicking Finish button, you should see datasource as listed below

.
To create Multi Datasource
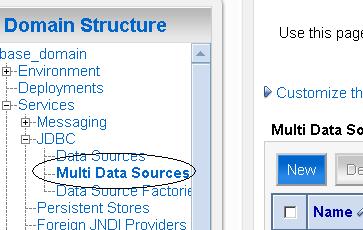
Steps mentioned above are to create single Datasource. To create Multi Datasource first create two or more Datasource as mentioned above (I created JDBC1 & JDBC2) then select Multi Datasources from console as shown below
.
.
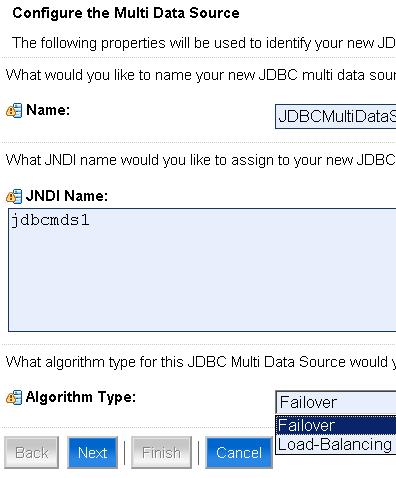
2. Click on New button above, In next screen select Name of Multi Datasource and JNDI
.
.
3. Select Algorithm Typefor Multi Datasource i.e. Failover or Load Balancing
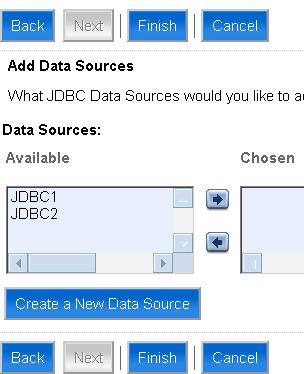
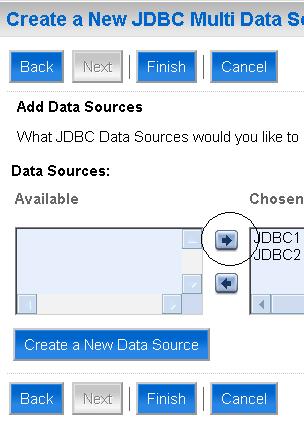
4. Select Datasource which you want to make part of Multi Datasource as shown below
.
.
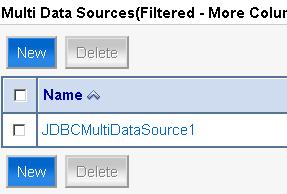
5. Finally click on Finish to see Multi Data Sources
JDBC tuning in WebLogic and lot more coming soon…
Did you get a chance to download Free Interview Questions related to WebLogic? If not, download it here http://k21academy.com/weblogic-interview-question

Learn Oracle Weblogic Server Administration
If you want to learn Oracle WebLogic Server Administration with tons of additional features like Live Interactive Sessions, Life time access to membership portal, Free re-taking sessions for next one year, Dedicated Machine to practice, On Job Support and much more
Comments are closed.